ExtraHop SAML Authentication with Azure AD
Published: 2022-09-09
Intro
I was recently working with a customer to configure Azure AD as the SAML provider for their ExtraHop appliances. Although the process is pretty well documented in the ExtraHop docs, it is spread out in a few locations and there are a couple of gotchas we ran into.
In this post, I will show you the process to configure your ExtraHop appliances for SAML authentication using Azure AD as the Identity Provider (IdP).
Software
The following software was used in this post.
- ExtraHop Sensor (EDA) - 8.9.0
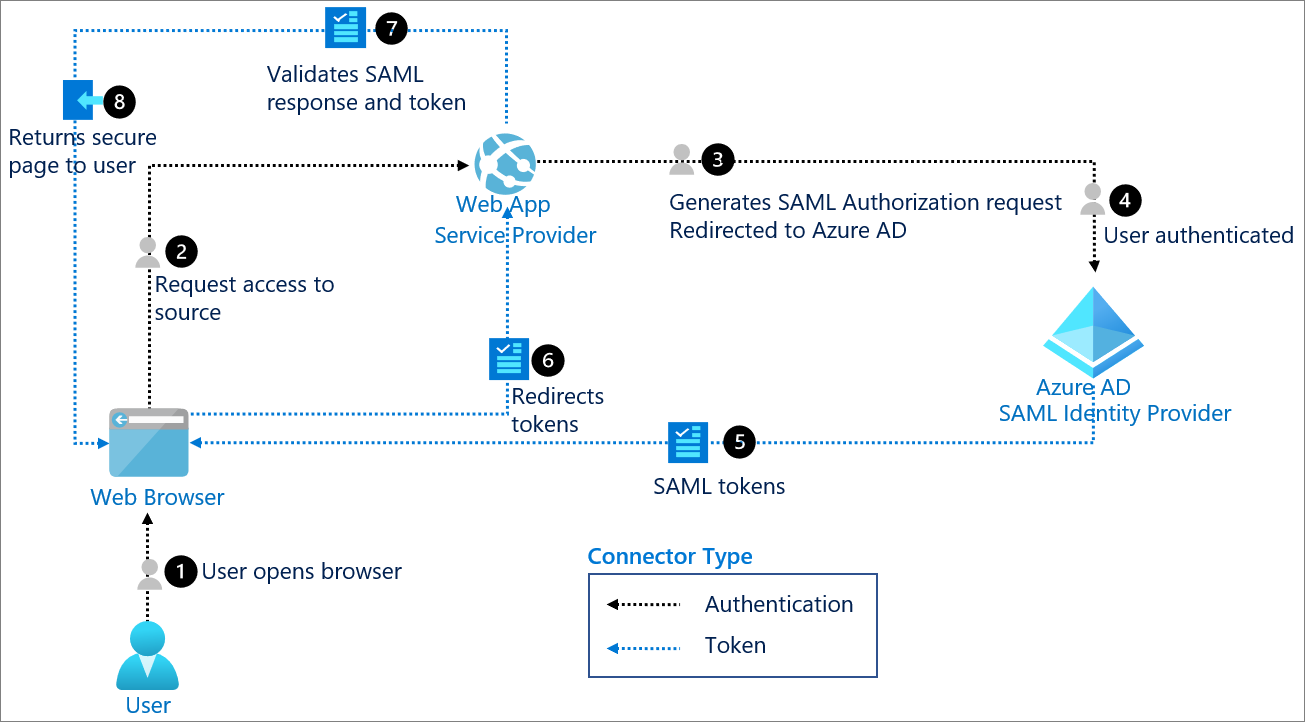
SAML Terminology
Some important terminology to be aware about SAML is as follows.
- Identity Provider (IdP) - Authenticates users and provides user identity
- Service Privider (SP) - Provides authorized access to resources based on identity from the IdP
- Claim - Information about the user.
- Token - Group of claims.
IdP SAML Requirements
In order for ExtraHop to use an IdP SAML authentication, the IdP must meet the following requirements.
SAML 2.0 Compliant
The IdP MUST support the SAML 2.0 standard
SP-initiated login flows
The IdP MUST support SP-initiated login flows. IdP initiated login flows are NOT supported.
Signed SAML Responses
The IdP MUST support signed SAML responses. Unsigned SAML responses are NOT supported.
Prerequisites
There are a couple of items to square away in both ExtraHop and Azure before we begin.
ExtraHop
Update the hostname to the FQDN and re-generate the SSL certificate. This ensures that we have the correct ACS URL in the SP Metadata configuration.
Hostname
On the Admin panel, browse to:
Update the hostname to the FQDN and hit Save.
SSL Certificate
Browse to: Admin panel.
Hit OK on the prompt that asks if you would like to regenerate the certificate.
Azure
Add the Azure AD SAML ExtraHop application to enable SAML based authentication.
SAML Application
In the Azure Portal browse to:
Search for Azure AD SAML Toolkit in the search bar. Select the application and rename it to Azure AD SAML ExtraHop then hit Create.
SAML Configuration
ExtraHop - SP Metadata
To complete the Azure side we need to SP metadata from the ExtraHop appliance. On the ExtraHop admin portal, browse to:
Select SAML from the dropdown and hit Continue.
On the next screen select View SP Metadata. You will need to note down the ACS URL and the Entity ID.
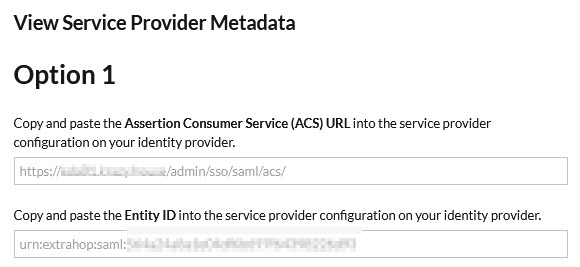
Once you have that information browse to the SAML application in Azure AD to complete the configuration on the Azure side.
There are 3 steps to complete.
- Basic SAML Configuration
- Attributes & Claims
- SAML Certificates
Azure - Basic SAML Configuration
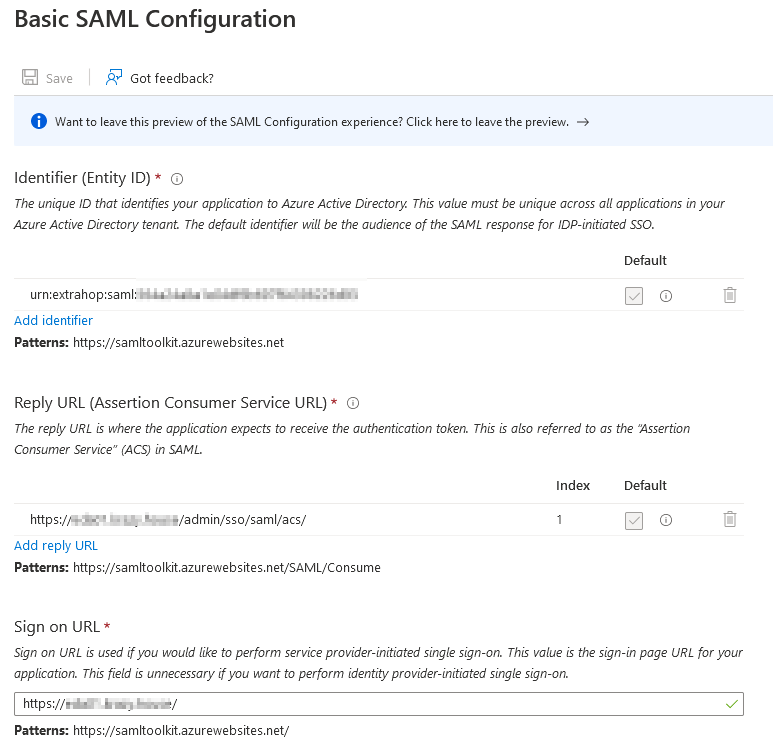
The table below lists the parameters and values that are required for the SAML configuration. The parameters are obtained from the ExtraHop SP metadata in the previous step.
The image below shows an example configuration.
Azure - Attributes & Claims
The tables below list the parameters and values that are required for the SAML attributes and claims configuration.
Required Claims - UUID
The first claim is used as a unique identifier for users within the ExtraHop platform.
Additional Claims - Identity
These next three claims are required by the ExtraHop platform. They MUST be sent in the SAML response or authorization will fail.
Additional Claims - Authorization
These next set of claims define the authorization groups.
The multiple conditions for the authorization claims are as follows.
Claim Name: user-level
Claim Name: packets-level
Claim Name: detections-level
The image below shows all the attributes and claims from the tables above.
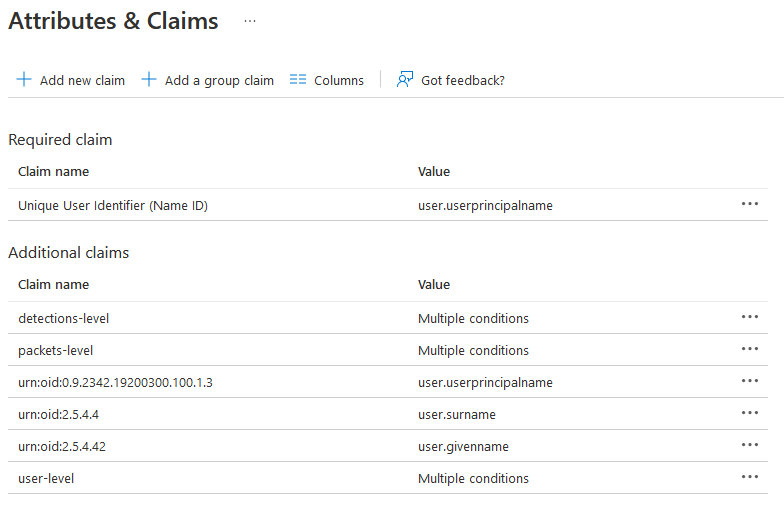
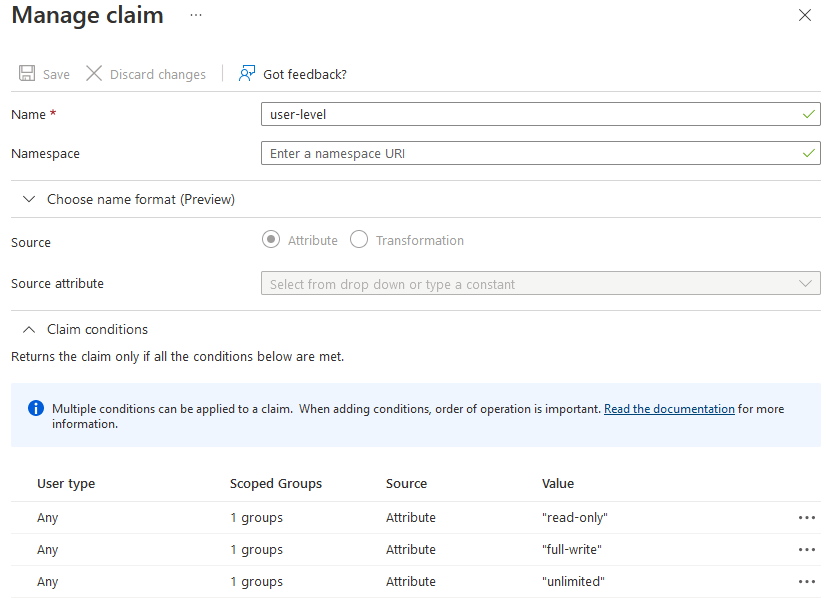
The image below shows the detailed view of the user-level claim. The other claims are configured in a similar manner.
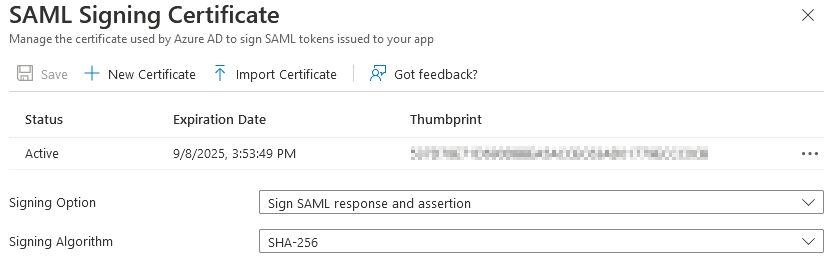
Azure - SAML Signing Certificate
By default, the SAML application in Azure AD does not sign SAML responses. Change the Signing Option dropdown to Sign SAML response and assertion.
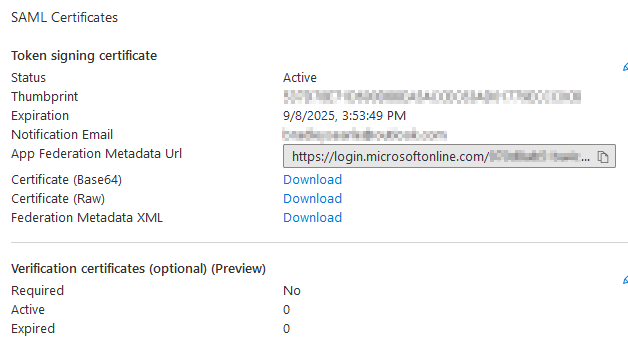
Download the SAML certificate: Certificate (Base64). This will be used in the ExtraHop SAML configuration in a future step.
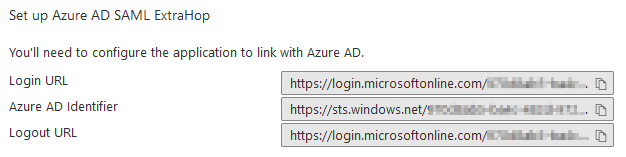
Azure - Set up Azure AD SAML ExtraHop
The details in the image below are required for the ExtraHop configuration.
ExtraHop - IdP SAML Configuration
The table below shows how the parameters in the Azure configuration map to the parameters in the ExtraHop configuration.
On the ExtraHop appliance, browse to the SAML configuration and add an identity provider.
Identity Provider
The table below list the configuration parameters for the identity provider section.
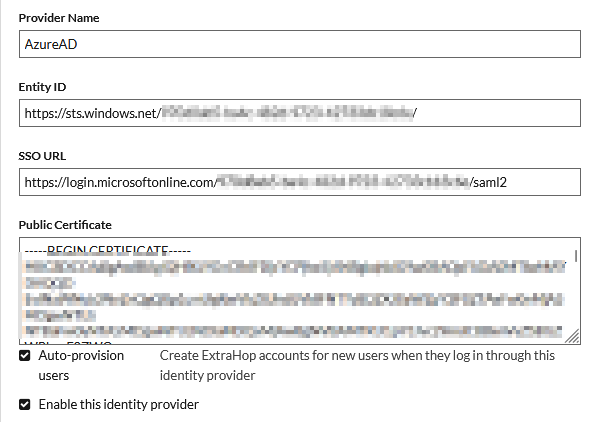
The certificate MUST be in the following format to be valid.
-----BEGIN CERTIFICATE-----
<BASE64 ENCODING>
-----END CERTIFICATE-----
Privilege Levels
Details around the user privilege levels and what they allow access to in the ExtraHop platform can be found in the docs here. How these group mappings are decided is based on the organizations security policy.
The next 3 sections MUST exactly match what is configured in the SAML claims seciton in Azure.
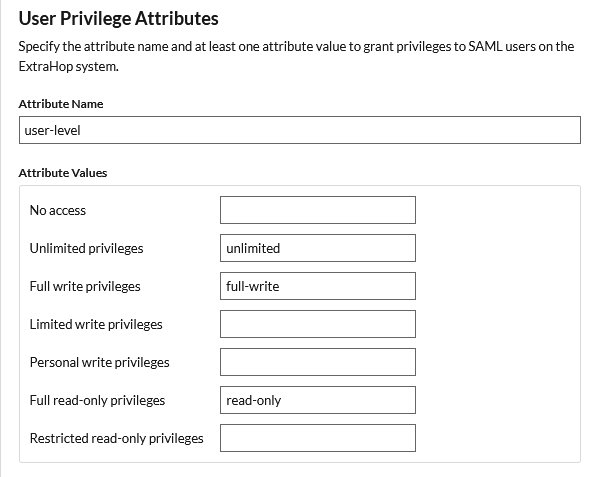
User Privilege Attributes
The following table lists the permissions mappings for the user-level attribute.
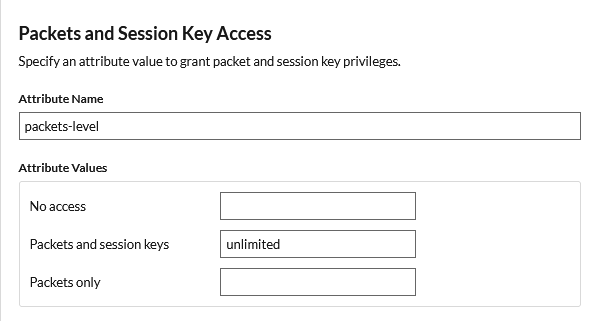
Packets and Session Keys
The following table lists the permissions mappings for the packets-level attribute.
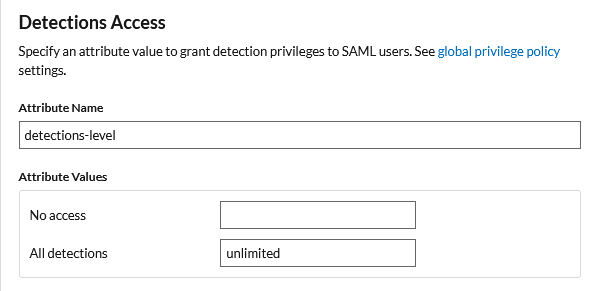
Detections Access
The following table lists the permissions mappings for the detections-level attribute.
Finally, hit the Save button to complete the configuration.
With that done, the configuration is completed, and we can now test our ability to login and access the ExtraHop platform.
Testing Access
To test your access, open a private browser window to your ExtraHop appliance. You will see an option to login with AzureAD.
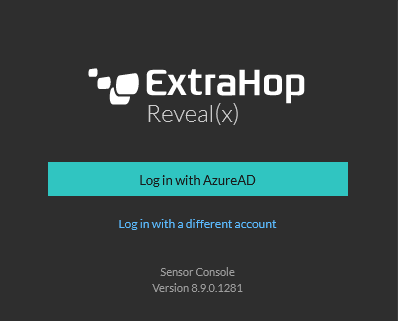
When you press the Log in with AzureAD button, you will be redirected to the Microsoft login portal. Once authenticated, you will be signed in with SSO across all you other SSO enabled applications.
The image below from SAML tracer confirms that the details send back in the SAML response are the same details we have configured throughout this post.
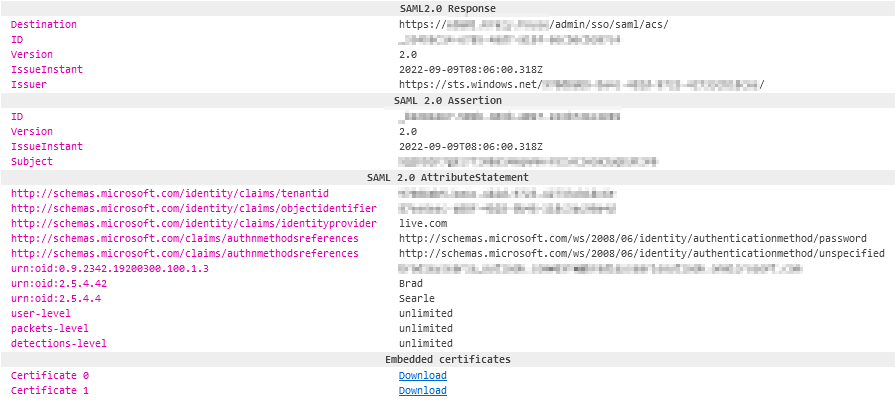
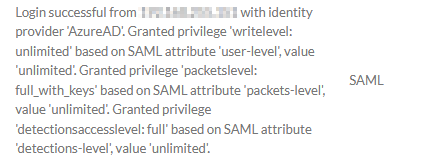
The privilege assignments can also be confirmed by looking in the audit log.
Finally, confirm that the user is created in the local users configuration.

Troubleshooting
A couple of common issues I have run into and their resolution is below.
Required Claims Not Presented
This error occurs when ALL the required claims are not present in the SAML response.
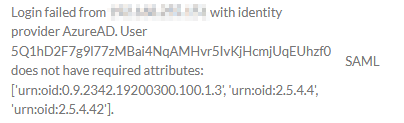
Resolution
Ensure ALL the required claims are configured in the IdP.
Unsigned SAML Response
ExtraHop requires the SAML reponses to be signed. If they are not, you will see the following error.

Resolution
Ensure the IdP is configured to sign SAML responses.
Outro
In this post, I showed you how to configure your ExtraHop appliances to use SAML authentication with Azure AD as an IdP. Please enjoy your SSO experience now with 100% more ExtraHop.
References
Links
https://docs.extrahop.com/8.1/configure-saml/
https://docs.extrahop.com/8.9/configure-saml-azure/
https://docs.microsoft.com/en-us/azure/active-directory/develop/single-sign-on-saml-protocol
https://docs.microsoft.com/en-us/azure/active-directory/fundamentals/auth-saml
https://docs.microsoft.com/en-us/azure/active-directory/saas-apps/saml-toolkit-tutorial
https://docs.microsoft.com/en-us/azure/active-directory/hybrid/how-to-connect-fed-saml-idp
https://docs.extrahop.com/current/users-overview/#user-privileges